 (Any views expressed in the below should not form the basis for making investment decisions, nor be construed as a recommendation or advice to engage in investment transactions.)
Yesterday, we launched 22 FX swaps on BitMEX – a new breed of crypto derivative that allows users to long or short some of the most popular foreign exchange (FX) pairs with up to 50x leverage.
Since then, we’ve received a tremendous response from retail and institutional traders alike – many of whom are eager to learn more about trading the world’s first crypto-margined forex contract.
So here it is. Read on for the 101 on how to trade FX swaps on our crypto derivatives trading platform.
If you haven’t yet created a BitMEX account, you can do so here.
Perpetual FX Swaps, Explained
A new type of crypto derivative invented by BitMEX, FX swaps allow traders to capitalise on price differences in foreign currency pairs, such as EUR/USD and USD/MXN.
Users who trade our FX swaps can post margin in Bitcoin (XBT) or Tether (USDT ERC-20) – and profit in XBT or USDT terms – as the exchange rate of a specific foreign currency pair changes.
As they’re margined and settled exclusively in crypto, our perpetual FX swaps can be traded 24/7 – without ever touching fiat currencies. When the FX market is closed and no FX prices are available, the contract will trade around the Friday close.
Like our other perpetual forex contracts, FX swaps on BitMEX also pay a funding rate (i.e. periodic payments to traders that are long/short based on the difference between perpetual contract markets and spot prices). You can learn about how our funding rates are calculated here.
For the 101 on how FX swaps work, you can read our blog here.
How to Trade FX Swaps on BitMEX
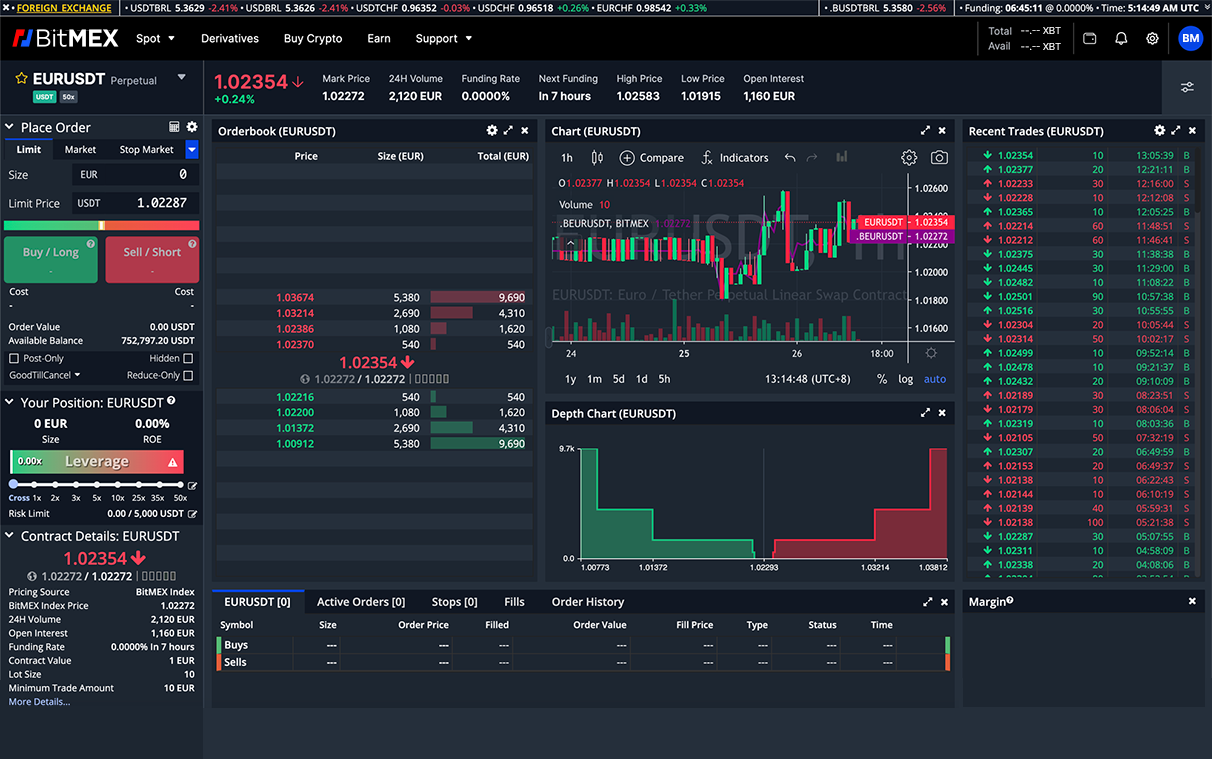
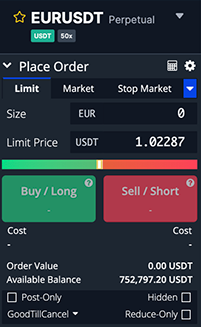
Users can trade FX swaps via our crypto derivatives trading interface, which looks like this:
 1. Choose the Perpetual FX Swap You Want to Trade
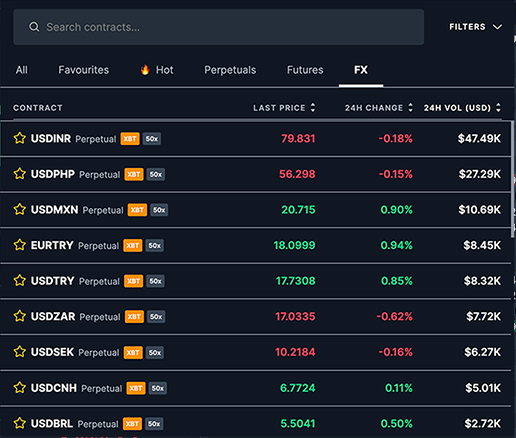
You’ll first need to select a listing from the contract picker – which you can access by clicking on the contract name. You’ll find it at the top left-hand corner of our crypto derivatives trading interface.
The contracts listed are sorted in descending order by default, based on the ‘24H Volume’. You can also choose to view the contracts in ascending order, or sort the contracts by ‘Last Price’ or ‘24H Change’.
Users can locate a specific FX swap by selecting the listing via the ‘All’ and ‘FX’ tabs on the contract picker, or by using the search bar. To speed up your search, you can also filter the list of contracts by margin currency.
To begin trading, click on the contract you want to trade.
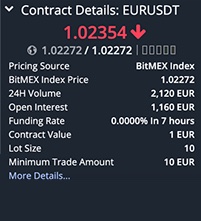
Once you’ve selected an FX swap, you’ll be able to view its contract specs on the bottom left-hand corner of the derivatives trading interface. To learn more about the contract, simply click “More Details…” or visit our Perpetual Contracts Guide.
2. Select Your Order Position and Leverage
How to Create an Order
Via the order panel, traders can choose from a broad selection of order types, the most popular ones being:
- Market orders: A market order is an order to be executed immediately at current market prices. Traders use this order type when they have an urgent execution. Pay attention to the orderbook when selecting this order type, otherwise a large market order may “walk the book” and incur market-impact costs.
If you wish to take liquidity away from the order book, you can place a market order via the ‘Market’ tab, specify the contract size, then click ‘Buy Market’ or ‘Sell Market’ depending on your direction to execute the order immediately. Note that you’ll pay a taker fee for this type of order (click here to view our current fee schedule). - Limit orders: Limit orders are used to specify the maximum or minimum price a trader is willing to buy or sell at. Traders use this order type to minimise their trading costs, however they are sacrificing guaranteed execution as there is a chance the order may not be executed if it is placed deep out of the market.
If you wish to add liquidity to the order book, go to the ‘Limit’ tab, specify your contract size and limit price, and then click ‘Buy / Long’ or ‘Sell / Short’ depending on your direction to create your order. Users who execute limit orders will be charged a maker fee. Note: if a trader has crossed the spread when posting an order, they will be a taker and pay a taker fee.
There are also other order types available, including:
- Stop limit/market orders: The stop-limit order is generally used to either set a stop-loss or a take-profit point. The stop price is the price where your stop-limit order will turn into a regular limit order (conversely – a market order if you use a stop-market order). The price tab, on the other hand, is showing when you want to buy. To use it as a stop-loss, users will need to input a stop price that, once reached, will trigger the limit order to be executed at that specified price. To use it as a take-profit, do the same but set a higher price than your entry.
- Trailing stop orders: Typically considered a more advanced order type, the trailing stop order allows traders to lock in profits. Alternatively, it allows traders to limit losses as the trade moves in either direction. This type of trade enables users to place a pre-set order at a specific percentage away from the market price when the market is swinging.
- Take profit limit/market orders: This order type can be used to set a target price on a position. It’s like a stop order, but triggers are set in the opposite direction. Users can create a profit limit/market order to exit a position in profit, or set an entry point for a new position.
How to Select Your Desired Leverage
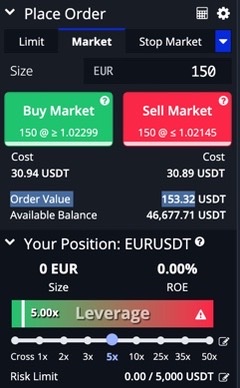
On the order panel, you’ll also find a leverage slider. FX perp traders can adjust the leverage of their position via the slider from 1x to 50x, or choose the cross-margin method. To learn more about our different margining methods, read our blog here.
Example: Say you want to create a market buy order on the EURUSDT FX perp using a leverage of 5x. You’ll first need to specify the contract size – e.g. 150 EUR. This puts the cost of your position at 30.94 USDT, but its order value is five times greater than this because you’ve applied leverage.
3. Monitor Your Order(s)
All of your open positions can be seen under the order book section of our derivatives trading interface. This is also where you can see your closed positions, active orders, stops, fills, and order history.
 How to Close a Position
If you wish to close an active position, you can do so by clicking on the ‘Limit’ or ‘Market’ button in the row of the position you would like to close. Note that you can specify the limit price in the column to the left.
Coming Soon: More Contracts, Token Listings, and BMEX Offers
Some choose to rest over the summer. We’re not. More crypto derivatives contracts, spot trading pairs, and BMEX offers are on their way, and will arrive at BitMEX over the coming weeks.
To be the first to know about our latest updates, you can connect with us on Discord, Telegram, and Twitter. We encourage you to also check our blog regularly.
In the meantime, if you have any questions please contact Support.