BitMEX is delighted to announce that the Proof of Liability (PoL) system is now fully live and operational. All BitMEX depositors can now verify their individual liability is included in the total exchange liability balance. This self verification process can be conducted without a third party auditor. Client privacy is preserved, because account balances are randomly split into multiple leaves of the Merkle tree. Reserve and Liability snapshots are published twice a week on Tuesdays and Thursdays.
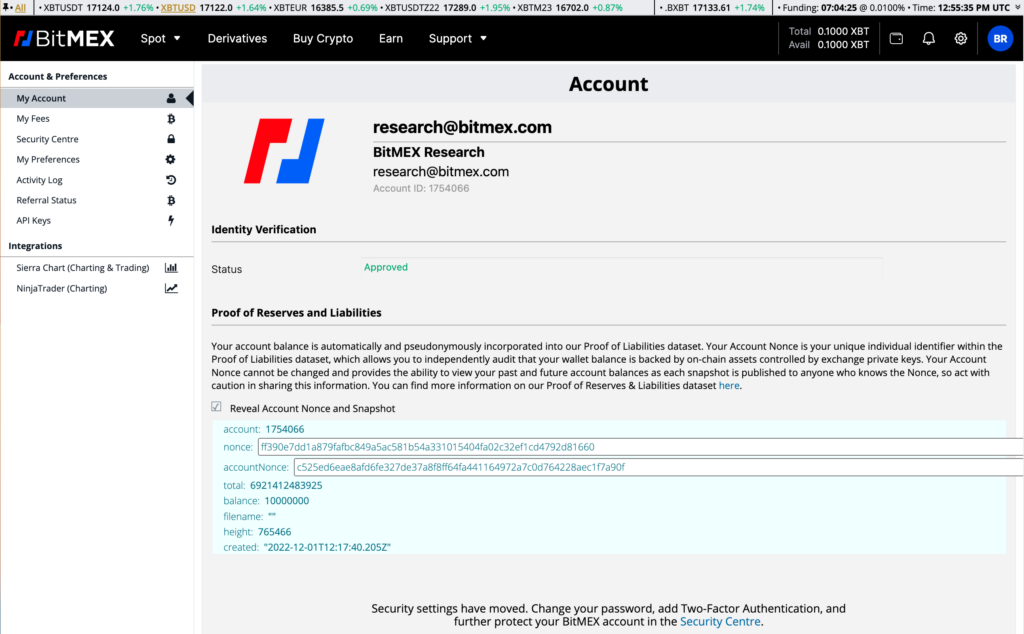
In order to search for your liability in the leaves of the Merkle tree, you can use your “accountNonce” for multiple snapshots or just the “nonce” for individual snapshots. These nonces are now provided to every BitMEX depositor and can be found on the website when you log into your account. The nonces are available in the “My Account” page, as shown in the image below. Once you have the nonce, you can search across all the leaves of the Merkle tree looking for a collision. The leaves where this collision occurs are your balance.
How to find your nonce?

How to conduct the PoL process?
|
Step |
Name |
Details |
|
1 |
Download the liabilities file |
Download the latest liability snapshot here: |
| 2 |
Install the tool |
The tools to verify the reserves and liabilities are open source and can be downloaded here: |
|
3 |
Open the Terminal |
If you are using a Mac or Linux, you open your Terminal application to run the necessary commands. |
|
4 |
Go to the directory |
You need to go to the directory where you downloaded the software package from GitHub. In our case we typed the following command: CD ~/Downloads/proof-of-reserves-liabilities |
|
5 |
Check system requirements |
In order to check the system has the correct applications installed, run the following command: |
|
6 |
Execute the proof of liabilities |
Run the below command |
PoL Result
An example output from the PoL process is shown below. The account has a deposit of 0.1 Bitcoin, split across four leaves in the Merkle tree.

